Braze
Overview
Enabling the Braze integration allows you to export Statsig exposure events to your configured Braze app with information on the status of each user's feature gate and experimentation groups. These exposures will be forwarded to Braze as a Custom Attribute object on the user. There will be one Custom Attribute per gate/experiment the user has been exposed to. The Custom Attribute in Braze will be named statsig_exposure::{gate/experiment name} and be of the form:
{
  group_name: String,
  timestamp: Time
}
You can then filter exposed users into a Segment in Braze. Custom Attributes will be forwarded to Braze users by having the unit ID from the gate/experiment as the external_id in Braze by default. You can choose to provide a custom Unit ID Type from your Statsig project to be forwarded as the external_id for all gate/experiment exposures. This can be provided in the ID Type Mapping section of the Setup dialog for this integration. The integration will attempt to use this custom ID Type if it is provided in the SDK call at the time of exposure, and will fall back to the experiment's Unit ID Type if not.
Setup in Statsig
This is available for Enterprise contracts. Please reach out to our support team, your sales contact, or via our slack channel if you want this enabled.
After it has been enabled, you will be able to find 'Braze' as an option in your Statsig project's list of integrations from within Statsig console.
- Open your Braze dashboard. Navigate to Settings > APIs and Identifiers, then open the API Keys tab.
- Create or select an existing API key that has the 'users.track' permission. Enter the API Key Identifier in the Braze Integration Setup dialog in your Statsig project.
- Find your Instance's REST Endpoint from the Braze API docs. Enter it in the Integration Setup dialog.
Segment Filtering in Braze
Once your integration is set up in Statsig, exposures can start firing into your Braze app. When exposures arrive in Braze from a new gate/experiment, you can create a filter on these users.
- Open your Braze dashboard. Navigate to Data Settings > Custom Attributes. You should see your new Custom Attribute from Statsig like below:

- Click 'Generate Schema'. It will automatically detect the schema like below:

-
Now you can create a Segment from these users. Navigate to Audience > Segments, and click 'Create Segment'.
-
Under the 'Segment Builder' section, add a new filter. Click 'Custom Attributes', then 'Nested Custom Attributes'.

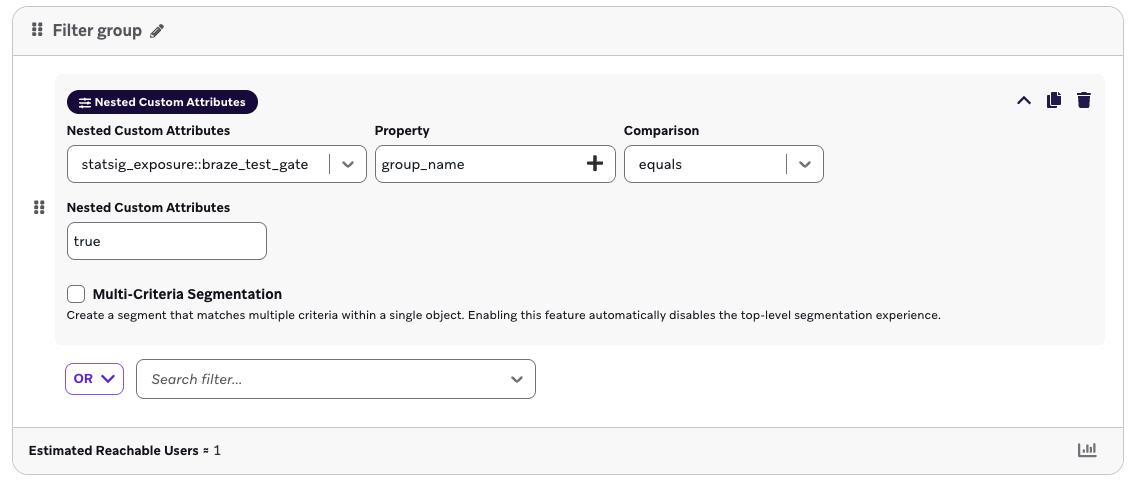
- Now you can filter to a specific group_name (true/false for gates, group name for experiments), or timestamp for your set of users. An example Segment filter for all users that have passed a specific gate is like below: